Using Xcode Storyboard for UI Building and Testing
The storyboard feature has been available in Xcode for some versions back already and personally, I’ve found this feature extremely handy to quickly build UI layouts, sketch things out and mock UI look-and-feels. It doesn’t only save your time and effort when building, mocking or designing user interfaces for your app, but it also produces great results. In addition, packaging things up in Xcode and send those for real device tests in the cloud is easier than ever.
Advantages of Xcode Storyboard
Frankly, Xcode Storyboard has numerous benefits for every app developer, but those also work as a great illustration for those who implement test automation for the app. Furthermore, if you select to start using Xcode, it’s always recommended to get a deep understanding of which pros and cons are provided with it for testing.
Visual UI Editor with Rich Features. With the help of Storyboard, you can visually design and edit UI layouts. This is where users can visually layout view controllers for the UI and define how they are connected to each other. A View Controller is a view-management functionality for UIViewController class.
In addition to UI design and creation, Storyboard maintains overview and list of all scenes that application has.
Compelling Overview of Scenes and Transitions between Views. Using Storyboard user can quickly get a glance of what is going on with UI transitions between different views. These transitions can be quickly connected in Storyboard by using drag-and-drop and it certainly makes the UI design and transitions easy and effortless.
Xcode Storyboard makes working with table views easier with any mock or static cell features. Users can design their table views entirely in the storyboard editor, and reducing the need to write code. This also saves quite a lot of time when things can be done just visually.
Auto Layouts. Another great advantage in Xcode Storyboard is the Auto Layouts. This features automatically calculates sizes and positions of all views in the hierarchy. Auto Layouts makes it easy to either dynamically or statically align UI components to adjust appropriate illustration. It’s especially a handy feature for scaling UI components for different sizes of screens and resolutions.
The Basics of Using Xcode Storyboard
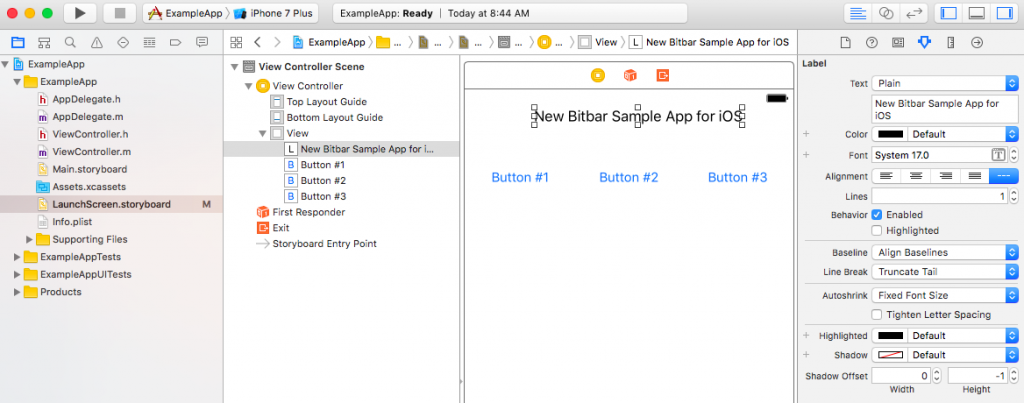
To get started with Xcode Storyboard, just create a new project (empty Single-View Application). Once Xcode is up and running, click .storyboard file, open and create UI for your application. The UI components can be dragged-and-dropped from the Object Library (if you use Standard Editor window the Object Library is on bottom-right).
Add any UI components, such as labels, buttons, text fields, segment controls, switches, sliders, activity indicators, progress views and any other UI items available on the menu.
Now, create another view controller (by selecting it from Object Library) and use drag-and-drop to connect your UI elements to the new view controller. I’m using the following example as a basis:
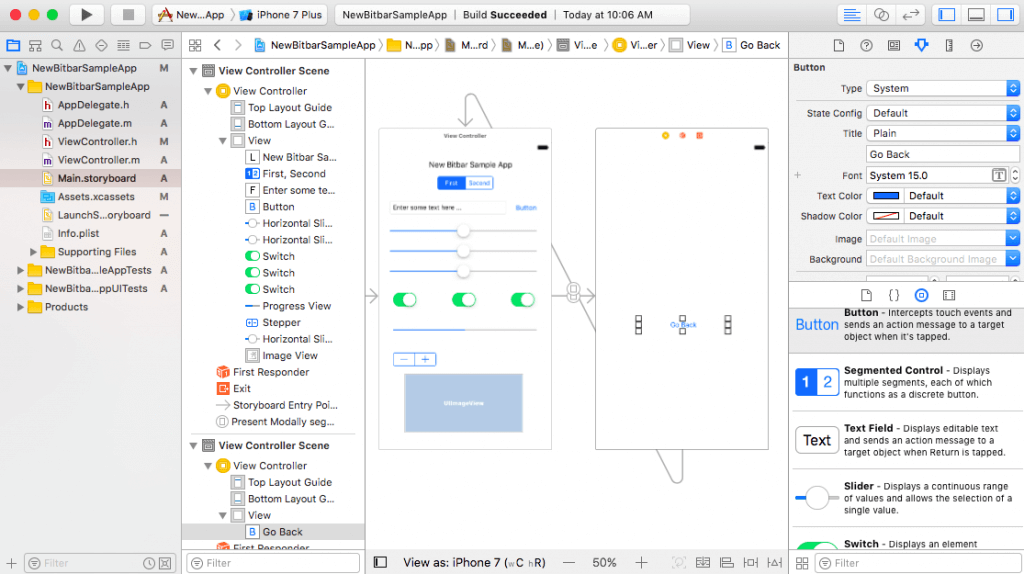
The view transitions (also known as Segues) can be connected to the buttons and other UI elements by pressing CTRL and dragging the mouse to another view. The view transitions are shown as arrow-type of lines and if you click any of those, parameters, identifiers, classes/subclasses, modules and so on can be configured on Storyboard Segues view (on the top right if you use standard editor view).
It’s also worth mentioning that if you edit launchscreen.storyboard you’ll get an error (error = Launchscreens may not have triggered segues) when the app is trying to be executed. All edits and UI creation should be done on main.storyboard or new storyboards.
Launchscreen.storyboard and main.storyboard are totally two different things. The launch screen is what first appears when the user taps the app icon before the app is finished launching. It shows a single, static screen. It can’t be dynamic and it can’t use any custom classes or code. Basically, it’s the replacement for launch images.
The main storyboard is what your app actually displays when the app is running. It contains your app, code, and all its logic.
Ok, that’s very basic stuff for creating a basic UI. Let’s see how to test these sort of UI mockups.
Testing UI components created with Xcode Storyboard
The easiest option to get XCUITests done for your app is to use Xcode Test Recorder. With this, native UI components can be identified and specific interaction on those is done automatically based on the object’s characteristics (class, ID, attributes etc.).
Just remember to highlight test function you’re about to record and wait until the app gets up and running. Here is the recorded example for above UI elements (this time with Objective-C):
    // Application init and XCUIElementQuery for label text
        XCUIApplication *app = [[XCUIApplication alloc] init];
        XCUIElementQuery *newBitbarSampleAppElementsQuery = [app.otherElements containingType:XCUIElementTypeStaticText identifier:@"New Bitbar Sample App"];
        [[[[newBitbarSampleAppElementsQuery childrenMatchingType:XCUIElementTypeSlider] matchingIdentifier:@"50%"] elementBoundByIndex:0] swipeRight];
    // Recorded Slider example, both swipe on left and right
        [app.sliders[@"64%"] swipeLeft];
        [app.sliders[@"46%"] swipeLeft];
        [[[[newBitbarSampleAppElementsQuery childrenMatchingType:XCUIElementTypeSlider] matchingIdentifier:@"50%"] elementBoundByIndex:1] swipeRight];
        [[[[newBitbarSampleAppElementsQuery childrenMatchingType:XCUIElementTypeSwitch] matchingIdentifier:@"1"] elementBoundByIndex:1] tap];
    // Button takes view to another view controller and click back to the first one
        [app.buttons[@"Button"] tap];
        [app.buttons[@"Go Back"] tap];
The XCUITest can be recorded for multiple view controllers.
However, sometimes you need to record a click (or other action) on a certain location where UI element is not identified using these items. The easiest way to implement a click on a certain position on the screen can be done with extensions.
Here is an example of XCUIElement extension for clicking a certain position on the screen:
    extension XCUIElement{
        func tapAtPosition(position: CGPoint) {
            let exact_coordinate = self.coordinate(withNormalizedOffset: CGVector(dx: 0, dy: 0)).withOffset(CGVector(dx: position.x, dy: position.y))
            exact_coordinate.tap()
        }
    }
And the extension would be used as follows:
    let point = CGPoint(x:512,y:200)
       app.tapAtPosition(position: point)
If you are looking for instruction on how to create IPA and test package for device runs, take a look at Bitbar Public Cloud how things are neat and easy.
Hopefully this boosted you to give Xcode Storyboard and Test Recorder a try! Let us all know what are the trickiest part of using Xcode Storyboard and in using Test Recorder.
Happy iOS Testing Folks!