We all love Selenium, but let’s face it: it can only test browser applications. So what happens if you work for a company that requires you to automate a bunch of different technologies?
Wouldn’t it be cool to be able to run all your Selenium, Unit and non-browser automation scripts from the same IDE and have all the results in just one test report? Well, with SmartBear’s TestComplete 10.5 you can now do just that!
SmartBear is one of the few test tool vendors that actually embrace open source technologies like Selenium. Heck -- one of my favorite API testing tools is their own open source testing tool --SoapUI.
To get a sense for Test Complete’s open-source automation goodness, I’m going to share with you just how easy it is to run a Selenium test from within TestComplete in just six simple steps.
1. Identify the Selenium test you want to run
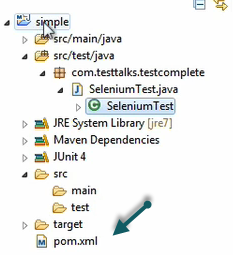
Identify the Selenium tests that you want to run in TestComplete. For my example I’ll be using Java and JUnit. In my project I can identify my test by looking for the jUnit @Test annotation.
2. Create a new Project
In TestComplete, create a new project (or you can add to an existing project.)
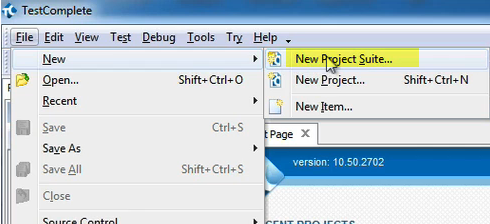
3. Add a Selenium collection to your project
Right click on the new project and Add>New Item.

Under Create Project Item, choose the Selenium or Unit Testing option.
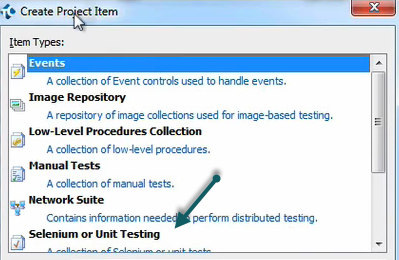
4. Select which Selenium Framework you are using
Right click on the new Selenium project and select Add>New Item.
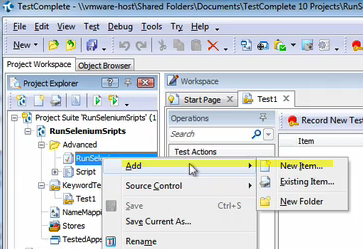
Under Create Project Item, select the framework that your Selenium tests are using:
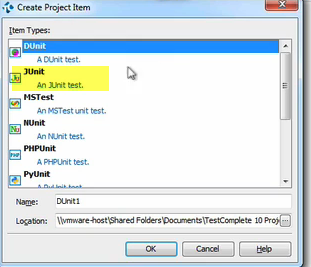
TestComplete supports the following frameworks:
- JUnit Test
- TestNG test
- PyUnit Test
- NUnit Test
- PHPUnit Tests
- Ruby Tests
5. Configure your project
Based on the framework you selected, your options will differ. These are the settings that need to be set for a jUnit framework test.
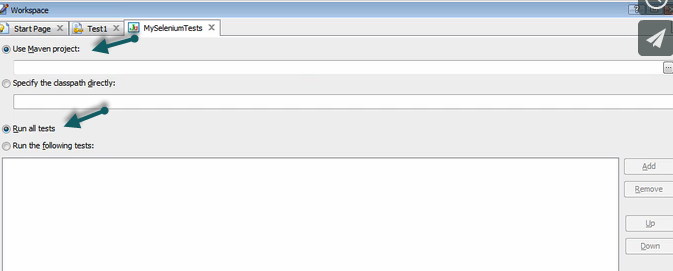
In this case I’m using Java with Maven, so I’m going to select Use Maven project and point to the pom.xml file location for the Selenium tests I want to run:
I want to run all tests, so I’ll select the Run all tests option.
6. Run your test
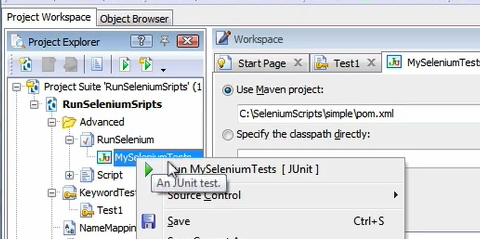
Right click on your project and select the Run yourProjectName [JUnit] option.
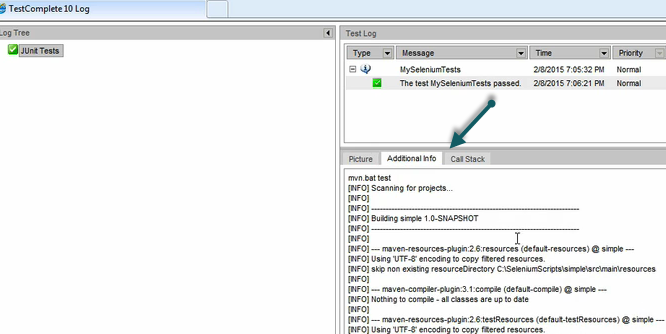
Once the tests finish, right click on your Log Items and select View Results in IE.
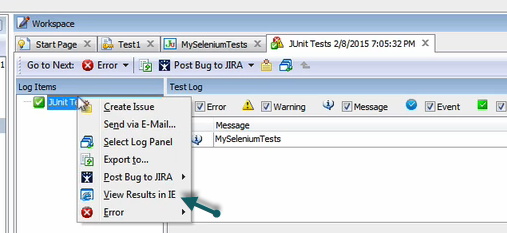
To view the actual Maven output that you would normally see in your IDE’s console output, click on the Additional Info tab:
Recap
Now it’s all up to you to unleash your imagination on the types of test automation you can accomplish -- all from within a central IDE -- to create your own test automation awesomeness.